How to Complete the Identity Proofing Process
Clinicians must complete the identity proofing (IDP) process, regardless of whether they will be enabled for EPCS before they can sign and send prescriptions. This is done to eliminate any unauthorized persons who may want to abuse the privilege of ePrescription (eRx).
Initiate IDP Process
After launching the DoseSpot application for the first time, there will be a screen asking to confirm any legal agreements enabled for the client. The “Identity Proofing Agreement” will launch the IDP process.
Initiate IDP Process (for EPCS only)
Note: This is only for those who will be eprescribing controlled substances.
If you see a pop-up asking for TFA, please disregard or close the pop-up.
If you will be eprescibing controlled substances, please contact support.
Click the eRx tab on your Clinic dashboard menu.
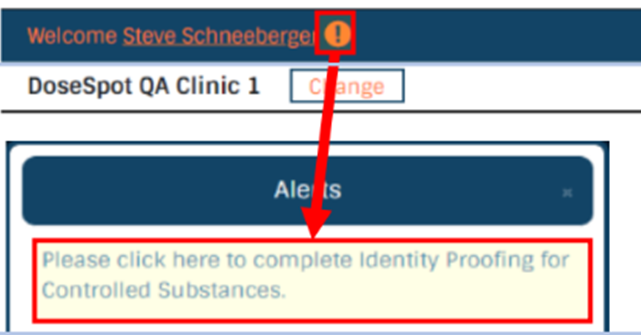
Click the exclamation point (!) icon next to the Clinic Name in the DoseSpot header (top left of the page).
An Alerts popup will appear. Click the link to launch the first step of the IDP process.

IDP Step 1
Review the policies linked and check the authorization box at the bottom of the popup. Fill out all fields on the form. A mobile phone number is required for identity proofing.
About Experian: Experian is a third-party consumer-credit reporting company that works with DoseSpot to confirm a clinician’s identity. They compare the information given to them with an individual’s existing credit profile to confirm their identity. No information provided during Identity Proofing is saved by DoseSpot. It is important to include accurate and up-to-date information to allow Experian to properly verify a clinician’s identity. This information will not be used for any purpose other than Identity Proofing.
Some information for IDP is optional, but to increase the likelihood of a successful IDP attempt, it’s recommended to also include all optional fields.
IDP Step 2
Once Step 1 has been completed with the proper info, mobile phone numbers will receive a text message containing a One Time Password. This password will expire in 7 days if not used.
Once the user has entered their One Time Password, they will move on to IDP Step Two.
IDP Step 3
If OTP was completed successfully, Experian will return a collection of financial-based questions and answers. The clinician must successfully answer three (and sometimes four) questions to complete identity proofing.
IDP Step 4
If identity proofing was completed successfully, the clinician will be prompted to set a unique 4-digit PIN number.
To set a PIN, click the “Set PIN” button. Enter a 4-digit PIN number and click “OK.”
This completes the IDP process.
Note:
-
PINs cannot be four repeating numbers (i.e., 1111) or 1234.
-
If the clinician failed to answer the questions correctly, they will receive the message “You have failed Identity Proofing. Please close this window and try again.” The clinician can attempt to complete identity proofing up to two times
Letter from Experian
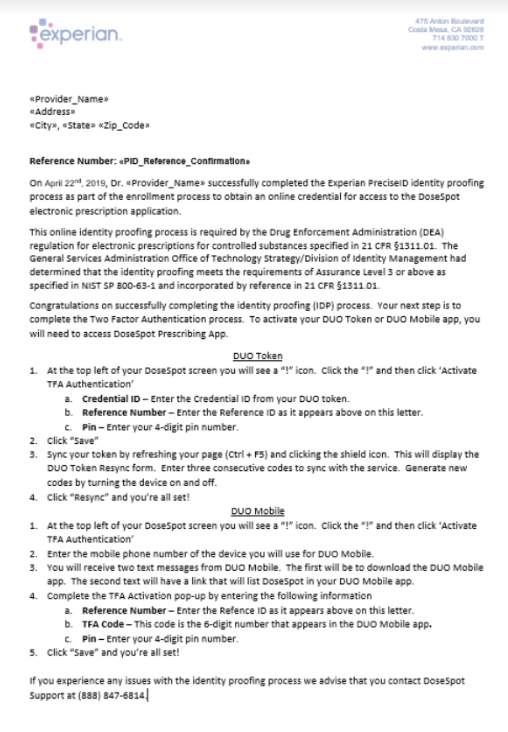
Following successful completion of IDP, Providers have the option to receive a letter from Experian with a unique Reference Number. This letter is sent in the mail to the user’s home address on record.
If Experian OTP fails or the provider opts out of the Experian OTP workflow, they will receive the letter displayed. The Reference Number is required to activate EPCS

Related Article:
For further assistance, please contact us here.
