
You can conduct a device test to make sure that you are all set for a VSee Call. The device test will walk you through testing of the browser, microphone, camera, and a sample call test.
How to Conduct a Device Test if I'm Not Logged In
How to Conduct a Device Test From the Clinic Page
How to Conduct a Device Test From the Profile Menu
What will I do during the Device Test?
Conducting A Device Test Without Logging In
A. You can conduct a VSee device test on your computer or mobile device by using the link below:
-
Go to
Clinic PortalThe test will run automatically.
-
Follow the instructions on the test link.
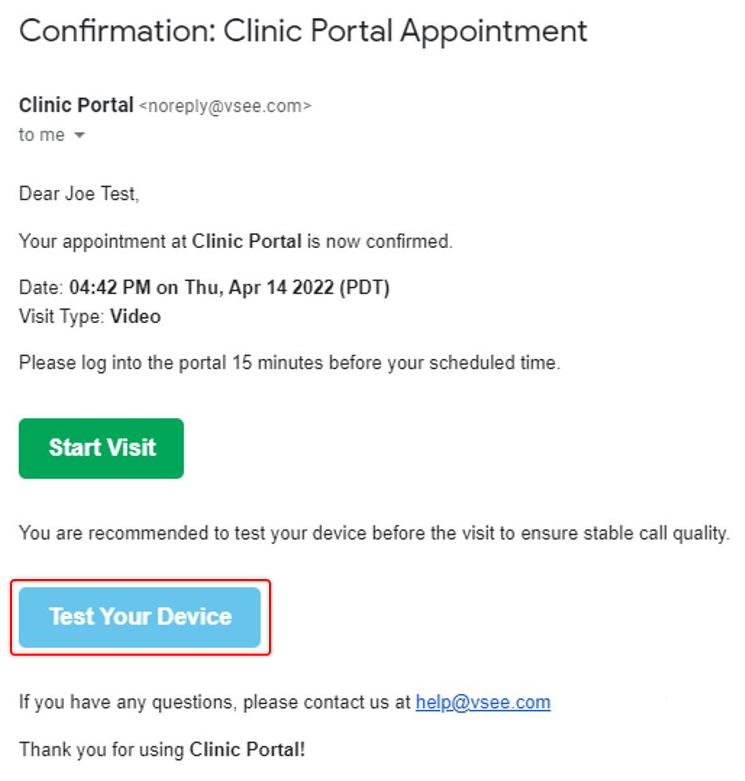
B. If you have a scheduled appointment with your provider, a link to the test will be included in the invitation e-mail. Click that link and you will be sent to the device test page.
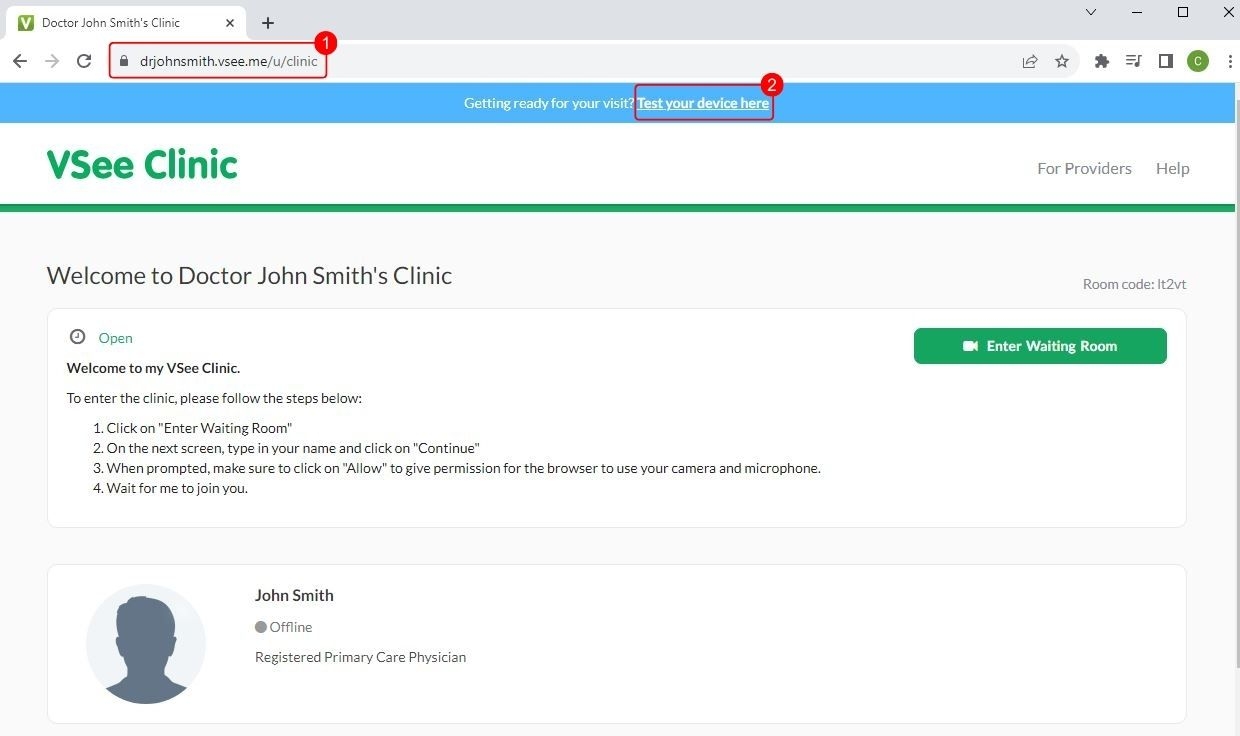
Conducting A Device Test From the Clinic Landing Page as a Patient
-
Go to the Clinic page of your provider.
-
Click on the “Test your device" located on the statement "Getting ready for your visit? Test your device here" on the middle-top portion of the page.
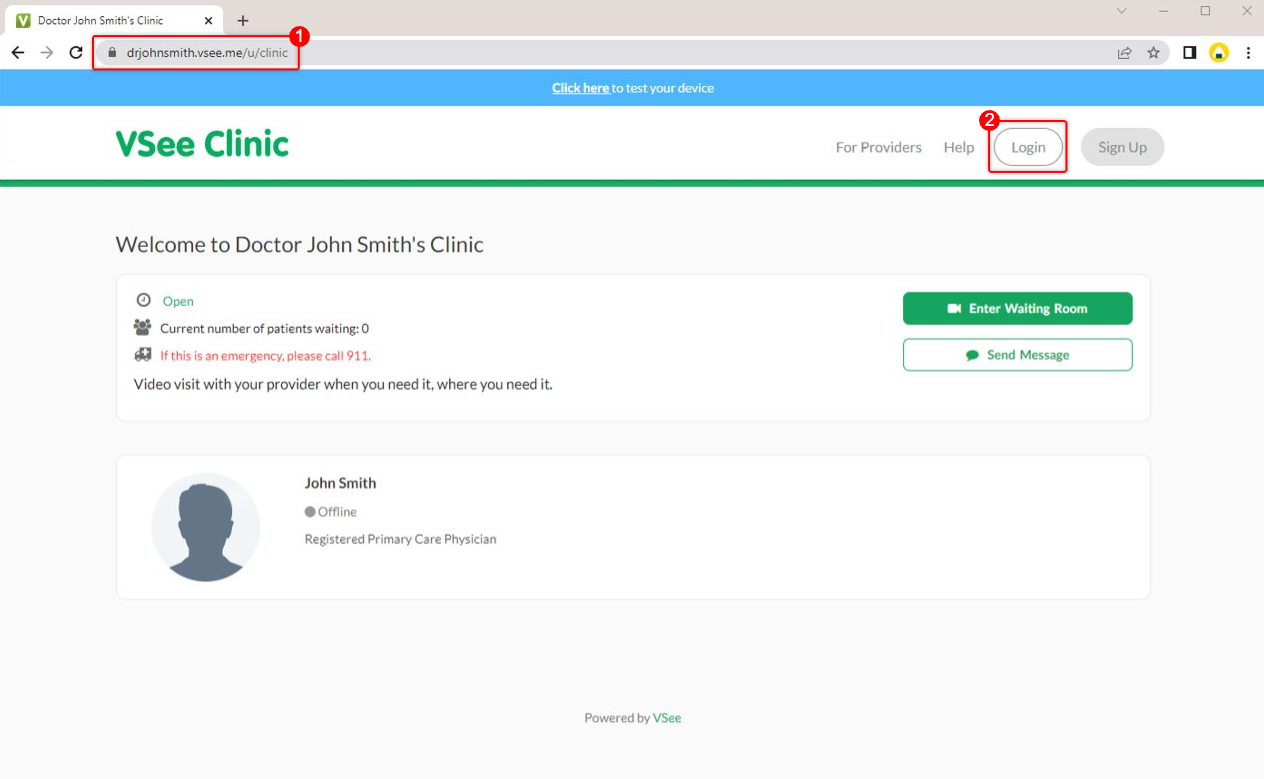
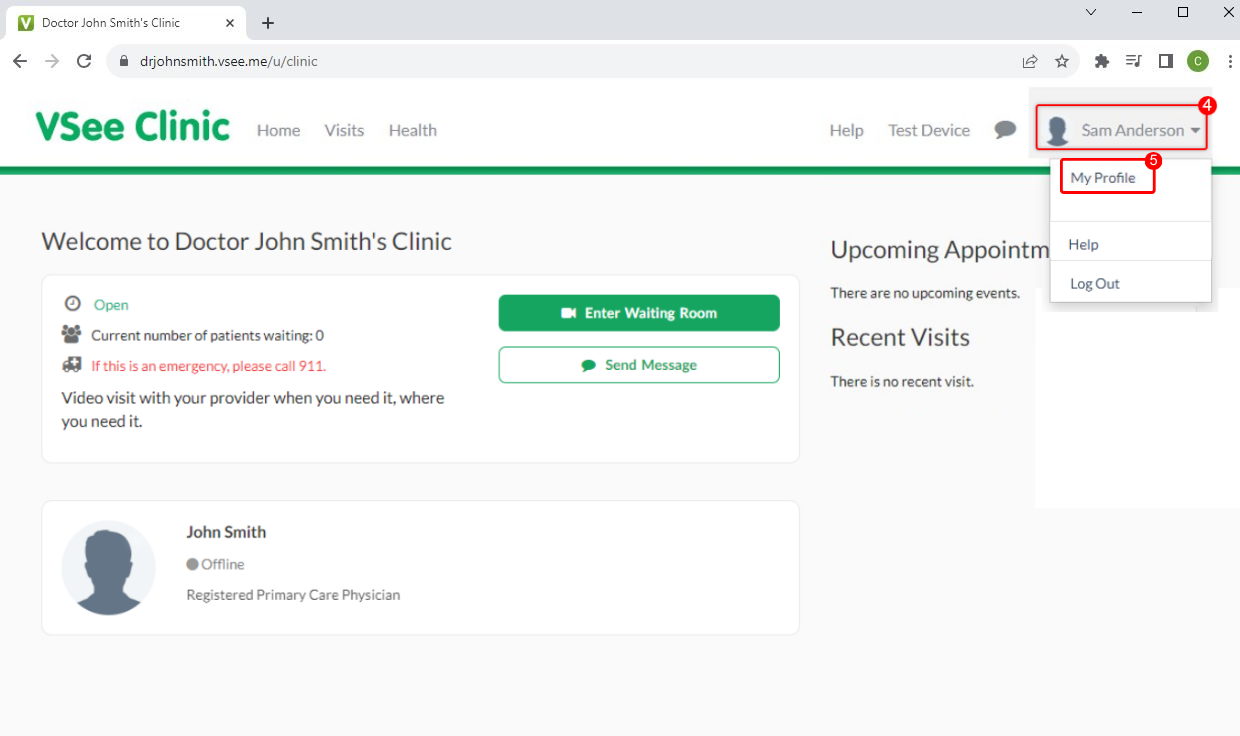
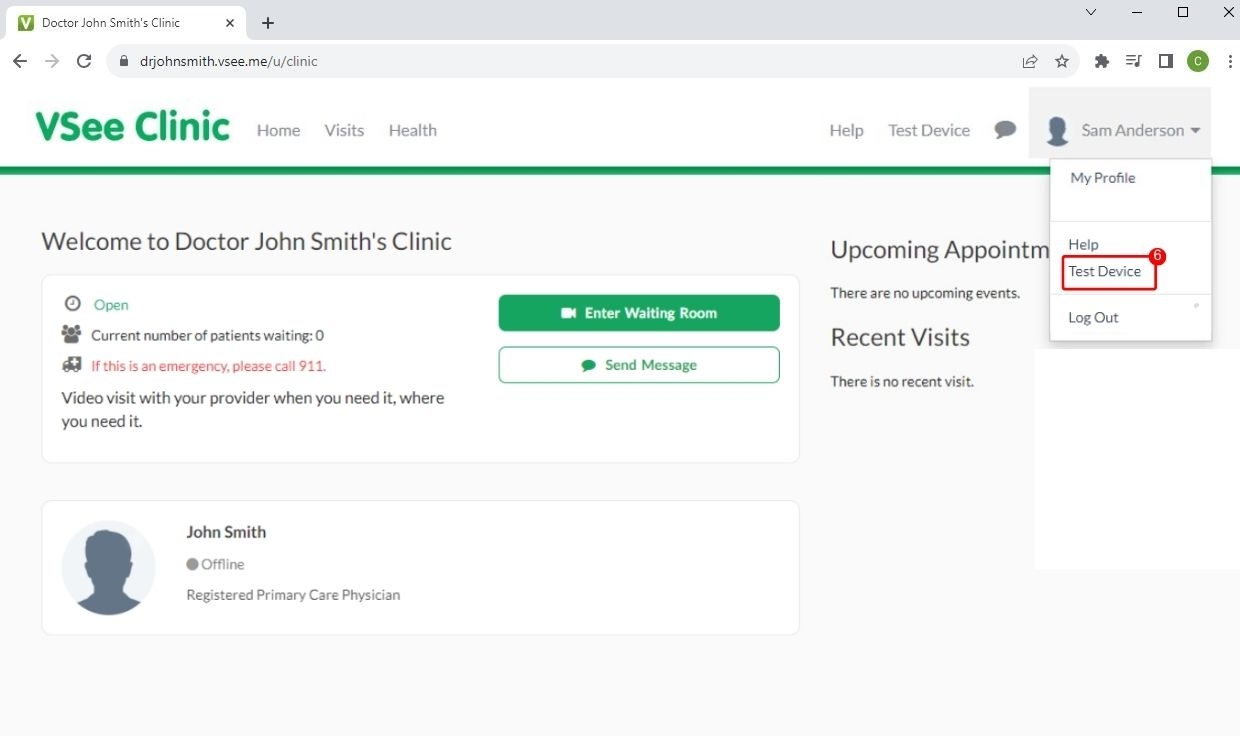
Conducting A Device Test from the Profile Menu
-
Go to the Clinic page of your provider.
-
Click on Login.
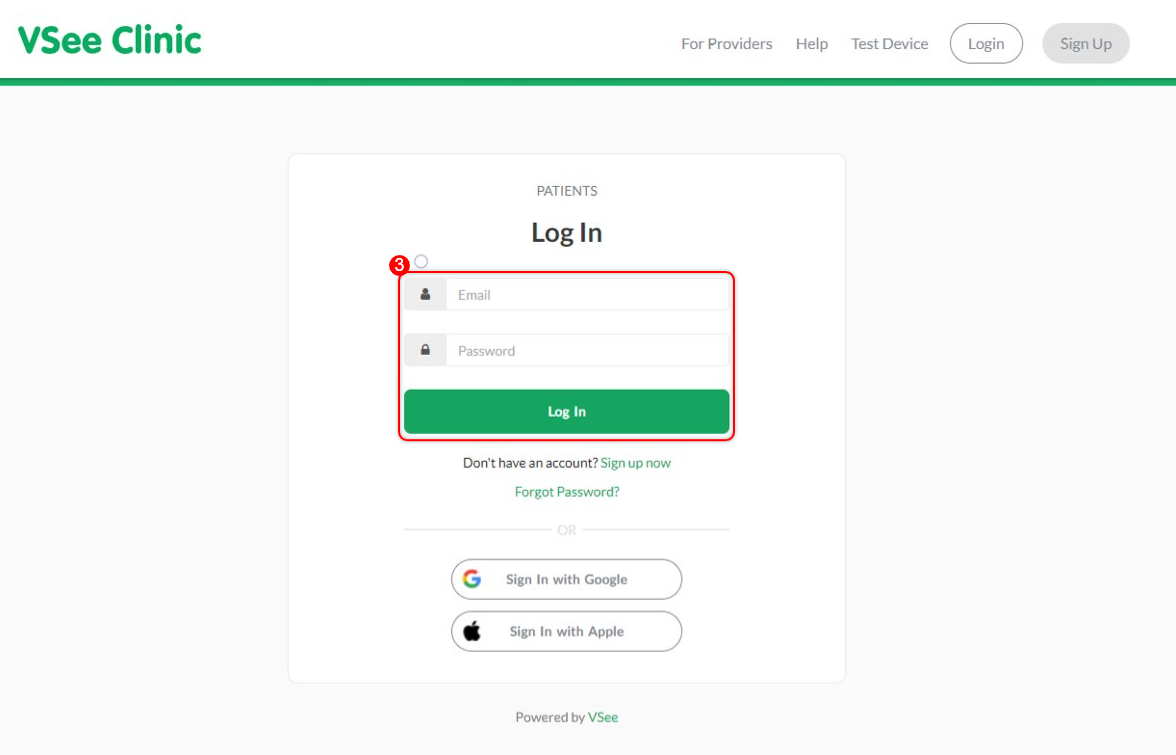
5. Click “My Profile”
What To Do During the Device Test
Browser Test
1. Upon opening the device test link, the Browser Test will automatically run to check your device OS (Operating System), browser, and network conditions. If the OS, browser version and network setup are suitable, a checkmark will appear on each item. Click NEXT.

Microphone Test
2. You will now be taken to the Microphone Test. If there are multiple microphones on your device, please select the one you will be using by clicking on it. (It is usually best to click the Default device on the uppermost selection) Once you have selected the mic, speak towards it.

- If the mic picks up too little sound, you will arrive at this page. Consider the recommendations mentioned and check your mic. Make sure that you have selected the correct mic and that it is not muted on your device's volume controls. Once you have checked the mic setup, click on Repeat Test to try the test again.

- If the mic works without any issues, you will see a waveform on the left side of the mic you have selected and will be taken to this screen to confirm that the mic works. Click on Next.

Speaker Test
3. The next test will be the Speaker Test. A continuous audio clip will be played to test the speaker output of your device. You can visually confirm the audio through a waveform shown on the left side of the speaker. If you can hear the audio well, click Yes.
- If you have multiple output devices (eg: Bluetooth speakers, headsets/headphones, or other external speakers that are connected to your device, please make sure to click the correct speaker that you will be using for the call. Usually, the default device is selected and works fine in most cases.
- If there is no sound or the sound output is too low, make sure that your device is not playing any other audio from different sources (Youtube, Music player apps, etc). If no other apps are running, check the volume settings of your device to make sure that the speaker you will be using is selected as the default speaker, that it is not muted (If this is the case, the speaker icon will have a line across it), and that the volume level is sufficiently high so that you can hear the audio clearly.

Camera Test
4. The next test will be for the Camera. When prompted by your browser, please make sure to click Allow this time or Allow on every visit to give access to the browser to use the camera. Once you have done this, click Next.
5. The camera test will now begin. Make sure to click the correct camera if you have multiple cameras connected to your device. After you have selected the camera and confirmed that you can see yourself in the box below the camera selection, click Yes.

Other Options
Restart your browser
Sometimes your web browser (e.g. Chrome, Edge, Safari) will have an issue connecting to your microphone/webcam device, and restarting the browser will resolve the issue.
Restart your device
Sometimes another application might be “using” or blocking access to your microphone/webcam. Make sure to completely close any other applications that might be using the camera (e.g. Skype, Zoom, etc.). You may also need to restart your device to solve the issue.
Check webcam shutters/sliders
Check webcam shutters/sliders which might be physically covering the cameras.
Call Test
6. The next test is the call test. This test aims to check if the device can send and receive data reliably for the call. It is not an actual call with a real person. The test will just send your video data and route it back to your device. You will just see yourself on both video feeds. Click Next.

7. The actual call test will now begin. You will see your video feed on two screens and the progress of the call test. You will not need to do anything at this point.

- Once the Call Test is done and no problems have been found, you will automatically be brought to the Network Condition page. This test will check your network speed and condition and will produce an overall grade of your network quality through a meter. Ideally, a “Good” or “Excellent” network condition is recommended.
-
If you encounter Poor or Fair network conditions, please try to double-check your network situation.
-
If you are using a Wi-Fi or Cellular connection, please make sure that you are in an area with good signal coverage.
-
If you are using a shared connection, make sure that there are no other people who are using the connection. Activities such as streaming videos in High-Definition, downloading large files, or conducting a separate video call will take up a lot of network bandwidth and will interfere with the quality of your VSee Call.
Congratulations, you have completed the Device Test.
8. Click on Finish and the browser window will be automatically closed for you.

Scope and Limitations
-
The VSee Clinic Test Device feature is not available for VSee Clinic Mobile App (for Patients)
-
If the Call preference setting is set to VSee Messenger, the VSee Messenger app will be launched to test the device.

Related Articles
-
You need to allow camera and mic permissions. If you have not done so, see Allow Camera and Mic Permissions.
If you have any questions, please contact us at help@vsee.com.