As a clinic admin, you also have the capability to set appointments with patients and open slots on behalf of the providers.
Opening Appointment Slots
Go to the Admin panel. (see guide)
1. Click on the Schedule tab.
2. You can filter the calendar by state, room, specialty and/or provider if you have a multi-provider. You may also edit the time division. If these are not necessary or applicable to you.
3. Proceed to click on Create.
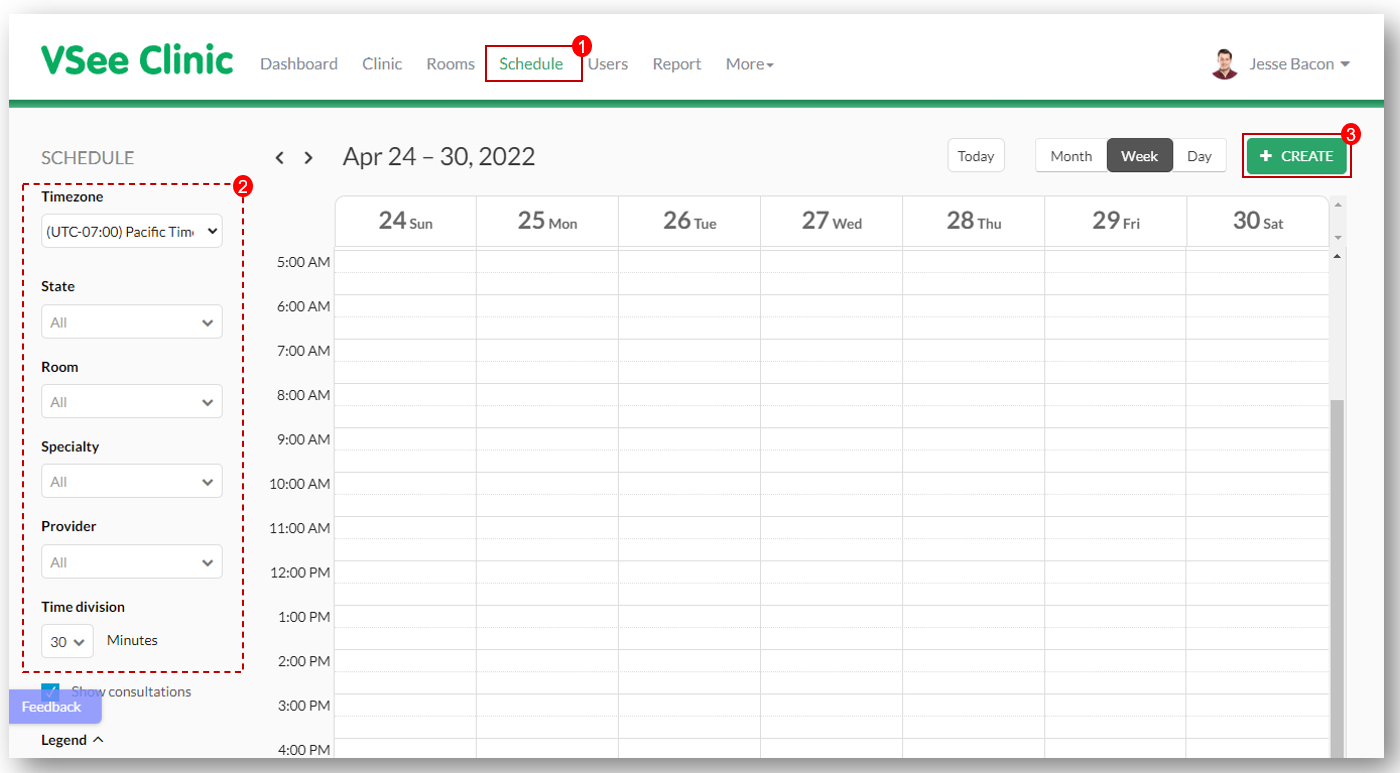
To create an appointment slot, you can:
a) Click the green + Create button and choose Create Slots;
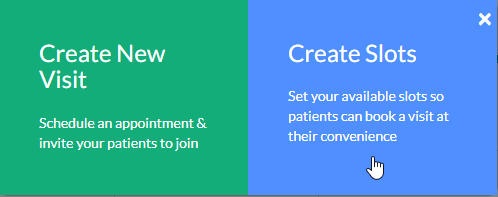
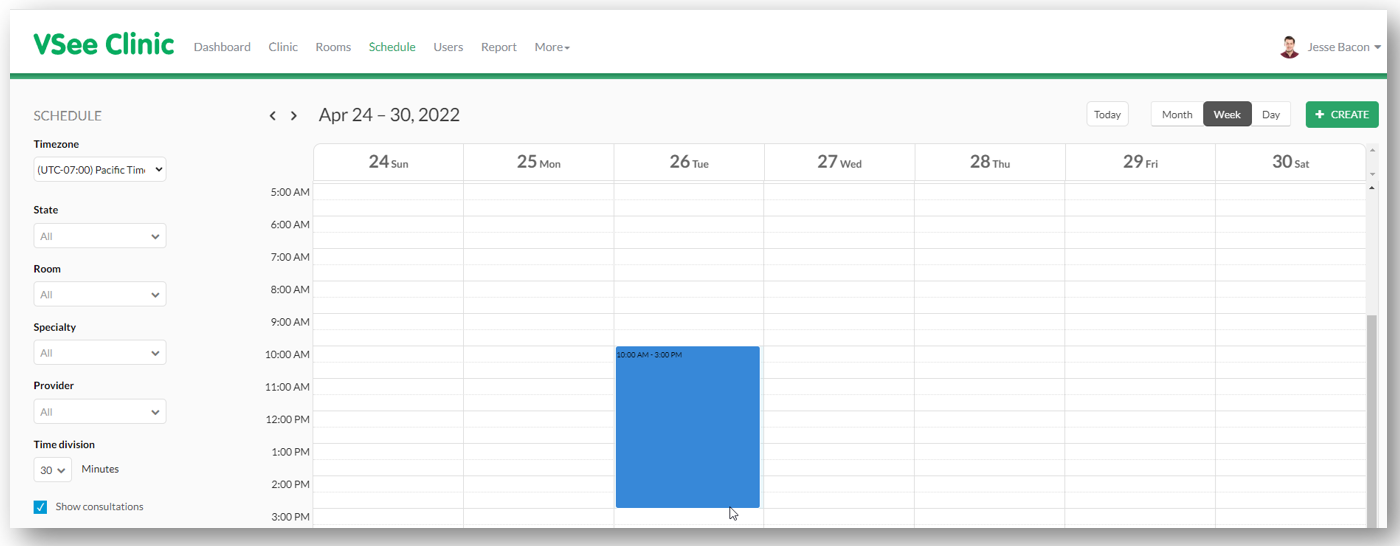
b) Another way is to click and drag the specific time on the calendar then choose Create Slots.
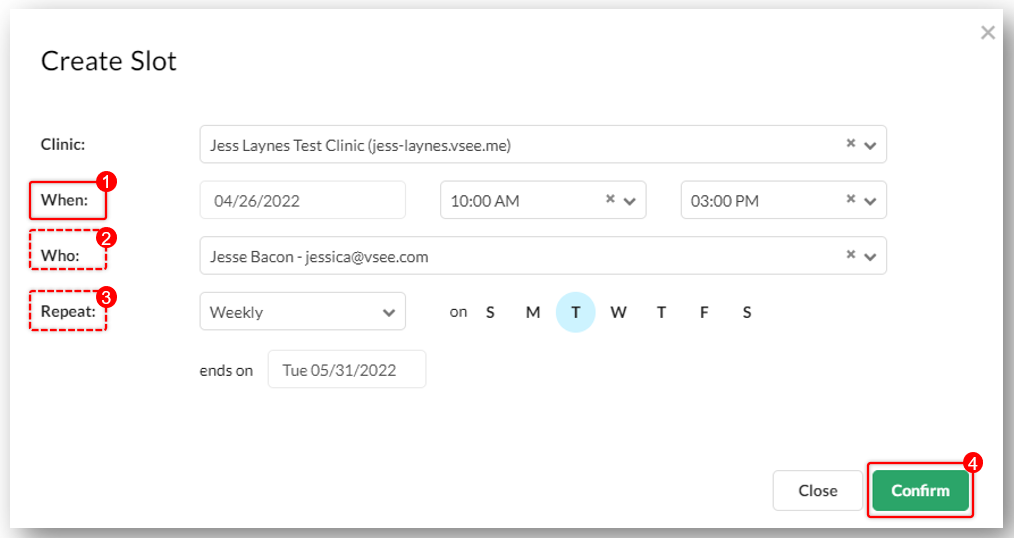
Specify the time slots and whose calendar you are setting the schedule for (if you have a multi-provider clinic). You can also opt to repeat the schedule daily, weekly, every weekday etc.
4. Click Confirm when done. These slots will now be visible to the patients when they book their appointments.
Creating a New Visit (Scheduled Appointment)
Follow steps 1 and 2 in Opening Appointment Slots.
To create an appointment with a particular patient:
a) Click the green + Create button and choose Create New Visit.
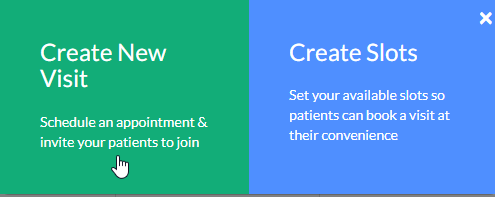 b) Another way is to click and drag on particular time slots (as with creating new slots) and choose Create New Visit when the options pop up.
Fill out the required fields;
1. Input the Visit Name, which is already filled out by default but could be changed by clicking on Edit on the right corner of the field.
2. Add the time (and date).
3. Change frequency if necessary.
4. Choose the Primary Provider if it’s a (multi-provider clinic).
5. Select the Visit Type.
6. Choose the Room (if Provider is assigned to multiple rooms).
7. Select the Visit Option.
8. Add the Patient.
9. After filling out all necessary fields, click on the Create Visit button.
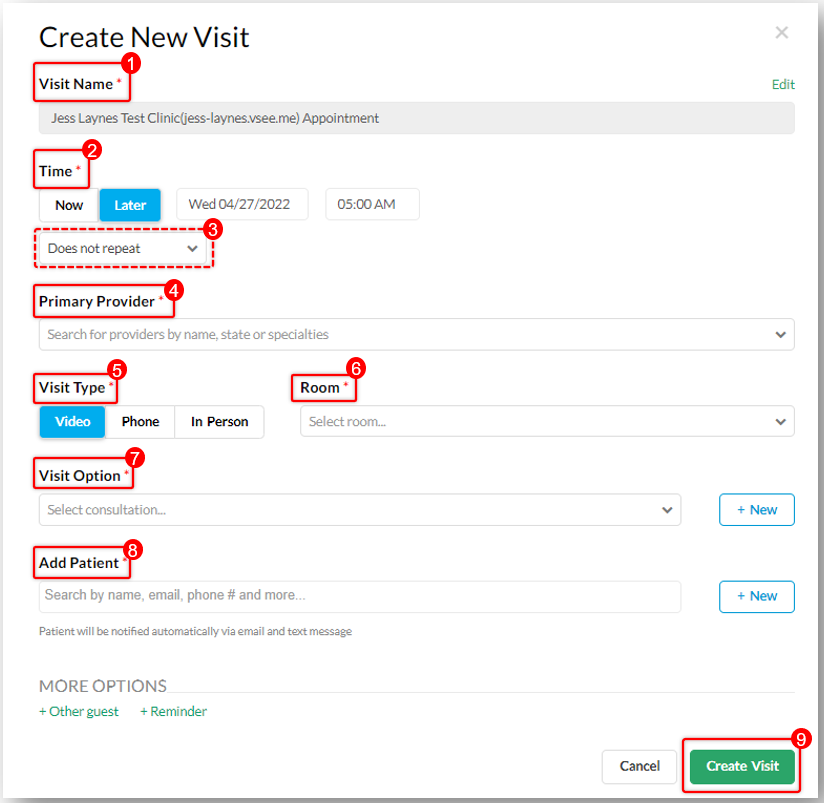
Note: You can create a new visit option and patient by clicking the + New button beside the Visit Option and Add Patient fields respectively.
Related Article:
e-Scheduling > Visit Slots and Patient Scheduling
If you have any questions, please contact us at help@vsee.com
Last updated on: 21 April 2022
