
Tagging is an effective tool used by providers to attach labels or identifiers to a patient’s visit. While the providers can use the free text field to create tags, the Clinic Admin can create custom labels and assign colors that providers can choose from later. In this section, you’ll learn:
Note: This feature may not be available in your clinic. Please contact Sales or your Account Manager to enable this feature.
Creating Tags
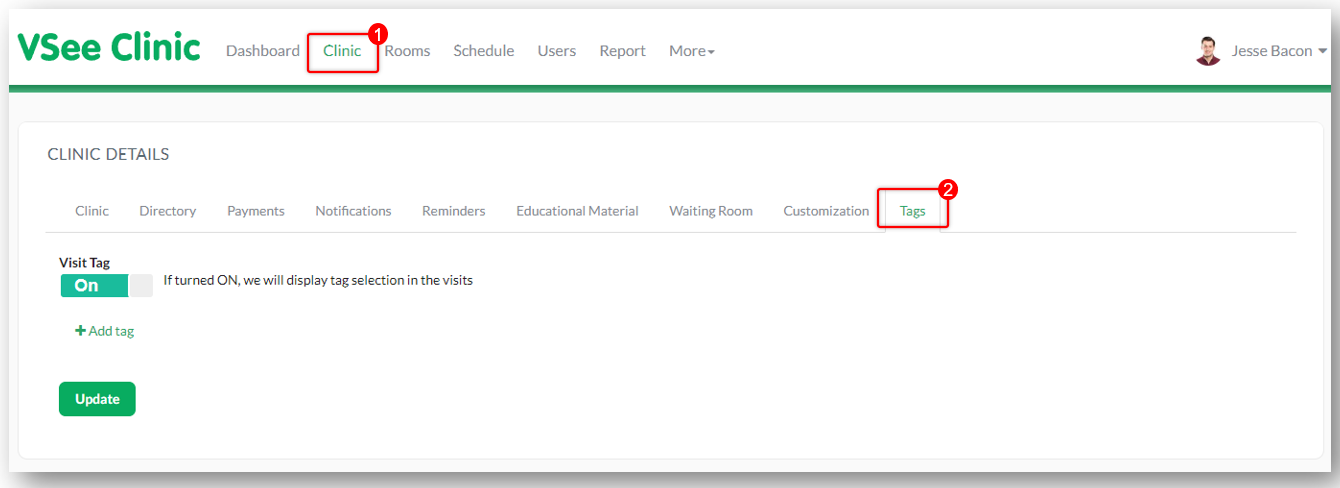
1. Go to the Admin Panel (see guide).
2. Click on the Clinic tab and choose Tags.
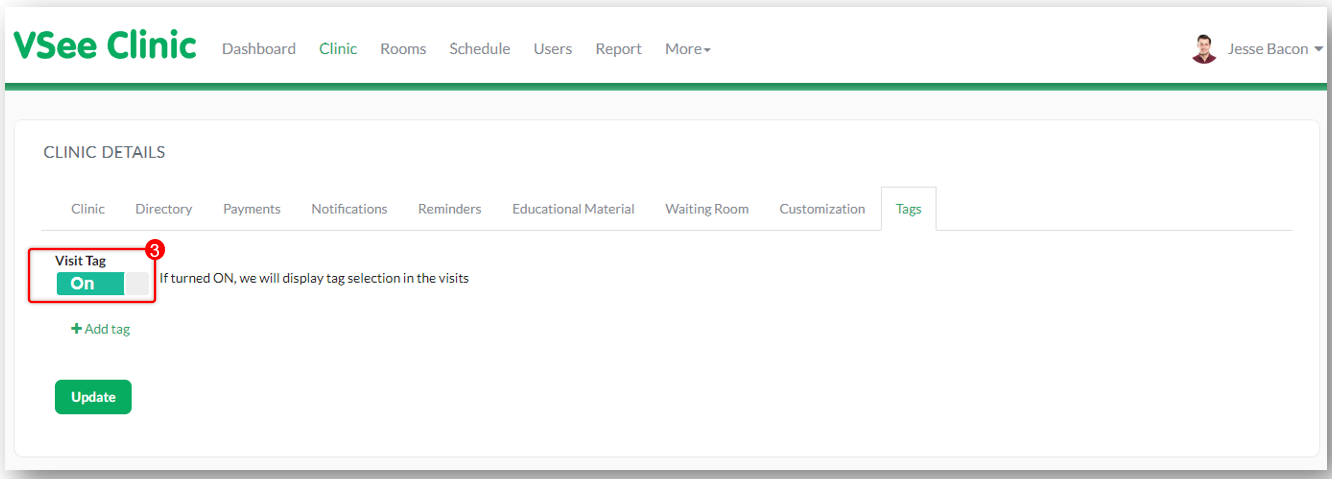
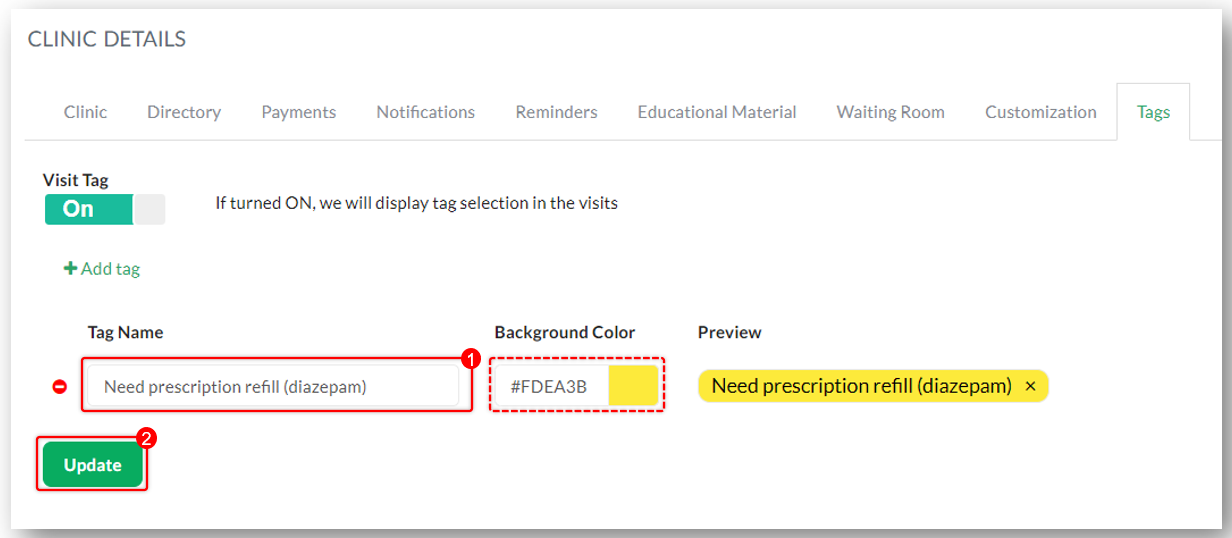
3. Switch on the Visit Tag toggle.
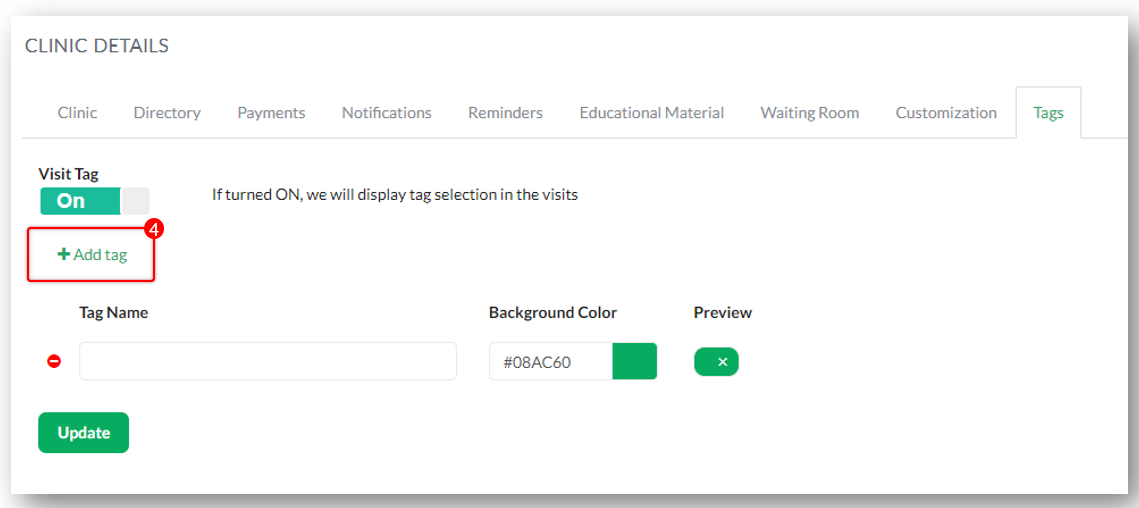
4. Click on the +Add tag and a field to create the tag should show up.
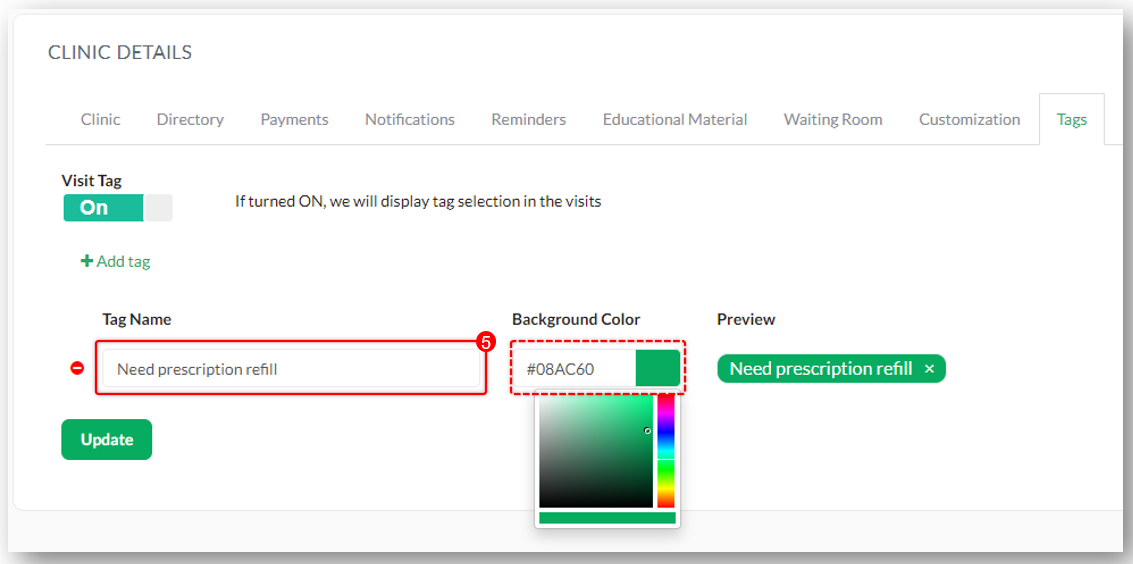
5. Type in the tag’s name on the field and press Enter on your keyboard.
Note: By default, the background color is #08AC60 but you can choose from the color picker by clicking on the color preview.
6. Click Update when finished.

Editing Tags
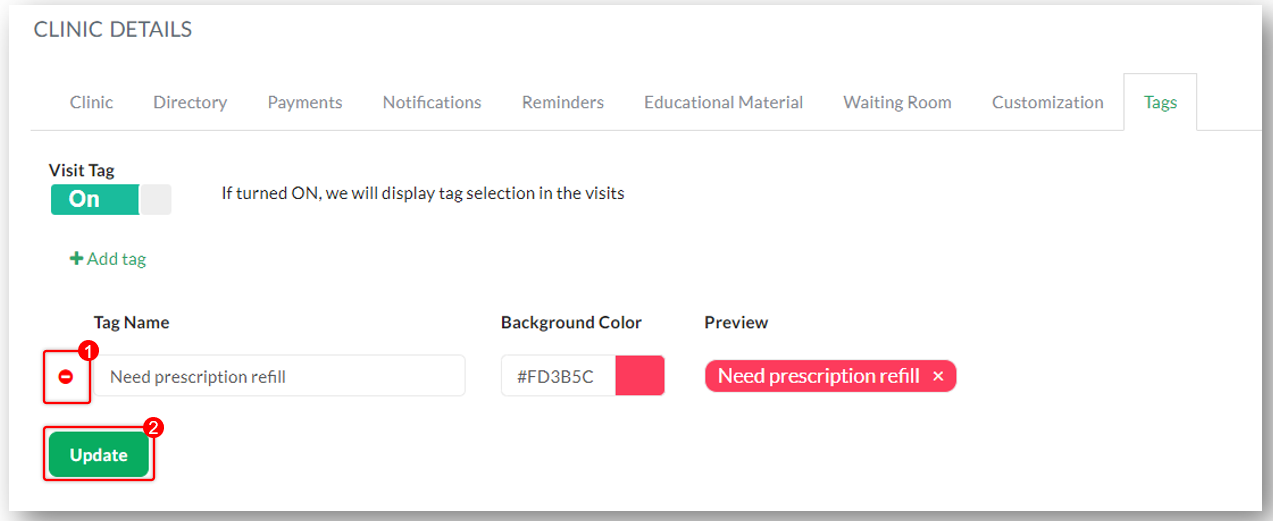
1. Follow steps 1 and 2 in the Creating Tags section.
2. Proceed to edit the tag name field and/or change background color (step 5 in Creating Tags section). Click Update when done.
Deleting Tags
1. Follow steps 1 and 2 in the Creating Tags section.
Click on the red button beside the tag name.
2. Click Update when done.
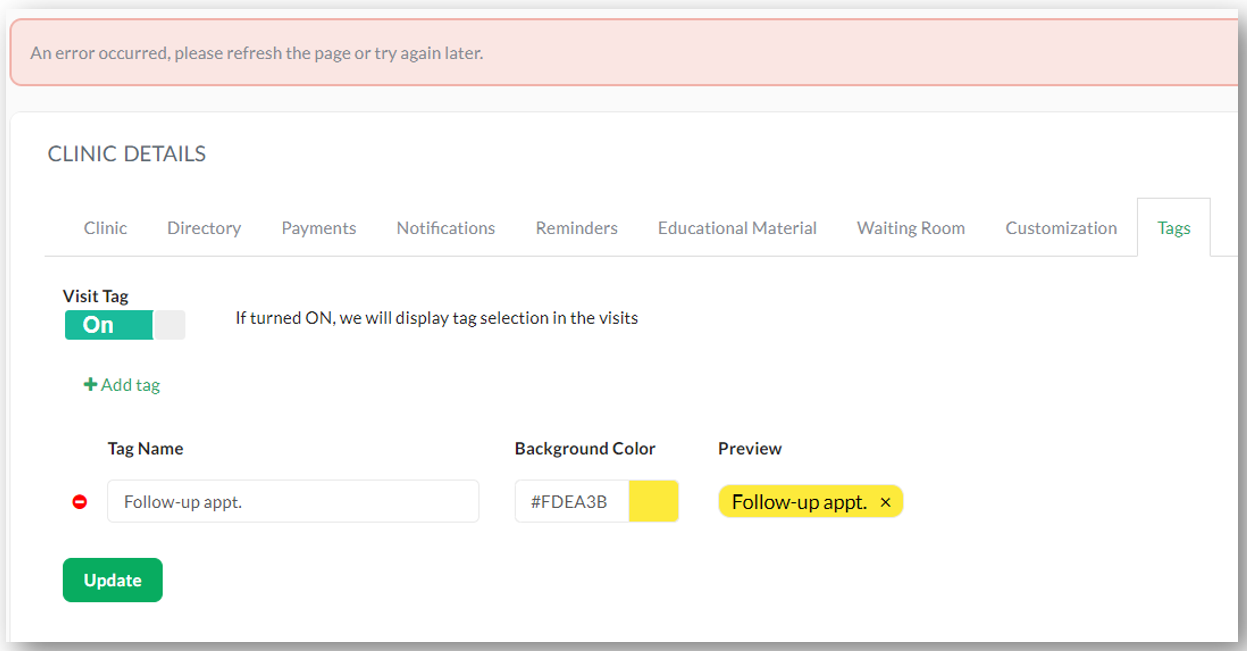
Note: Some characters, such as period (.), and comma (,) are considered invalid. You will receive an error notification when these are used.
Related Article
Need more assistance? Send us an email at help@vsee.com or check out the Help section under the Profile Menu of your VSee Clinic.
This article was last updated on: 11 April 2023