
Available on June 21, 2022
VSee Clinic now allows Provider-to-Provider web chats. There is no more need for you to use the VSee Messenger app just to contact other staff of the clinic. All providers/staff (e.g. CSR, MA) that belong in the same waiting room are automatically added to each other’s contact list.
How to Start or Continue Chat with Provider/Staff
How to Add or Remove a Participant in the Chat Group
How to Manage Chat Options
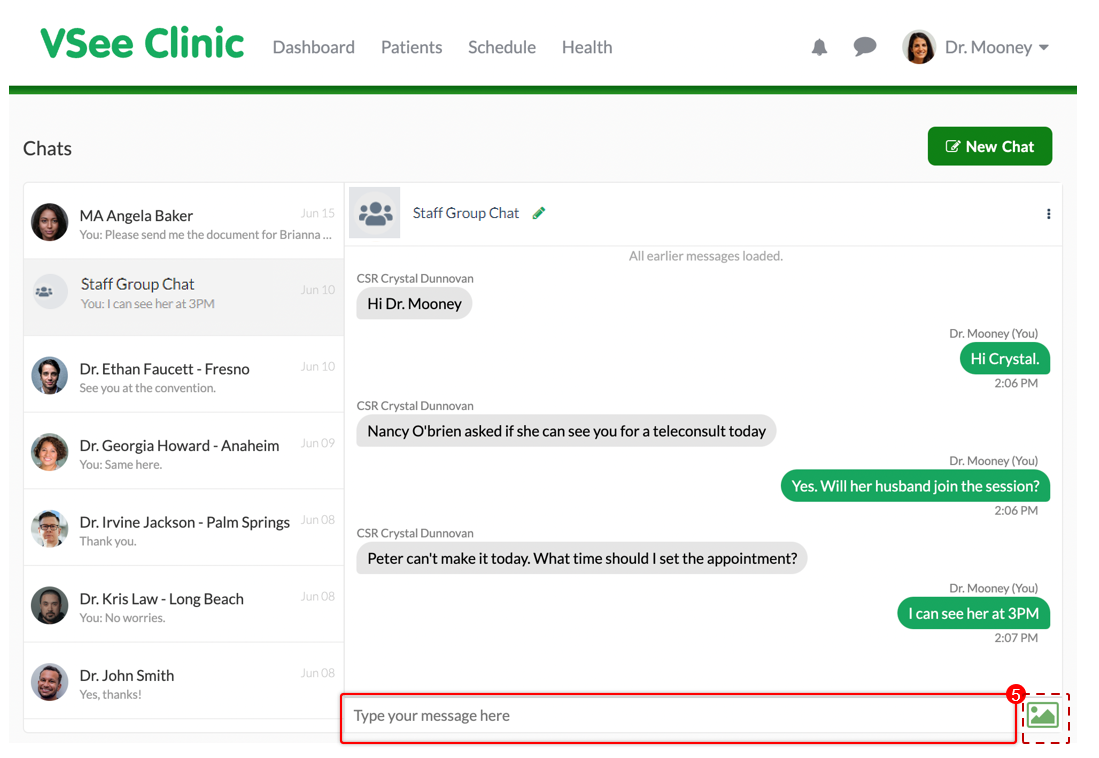
Start or Continue Chat with Provider/Staff
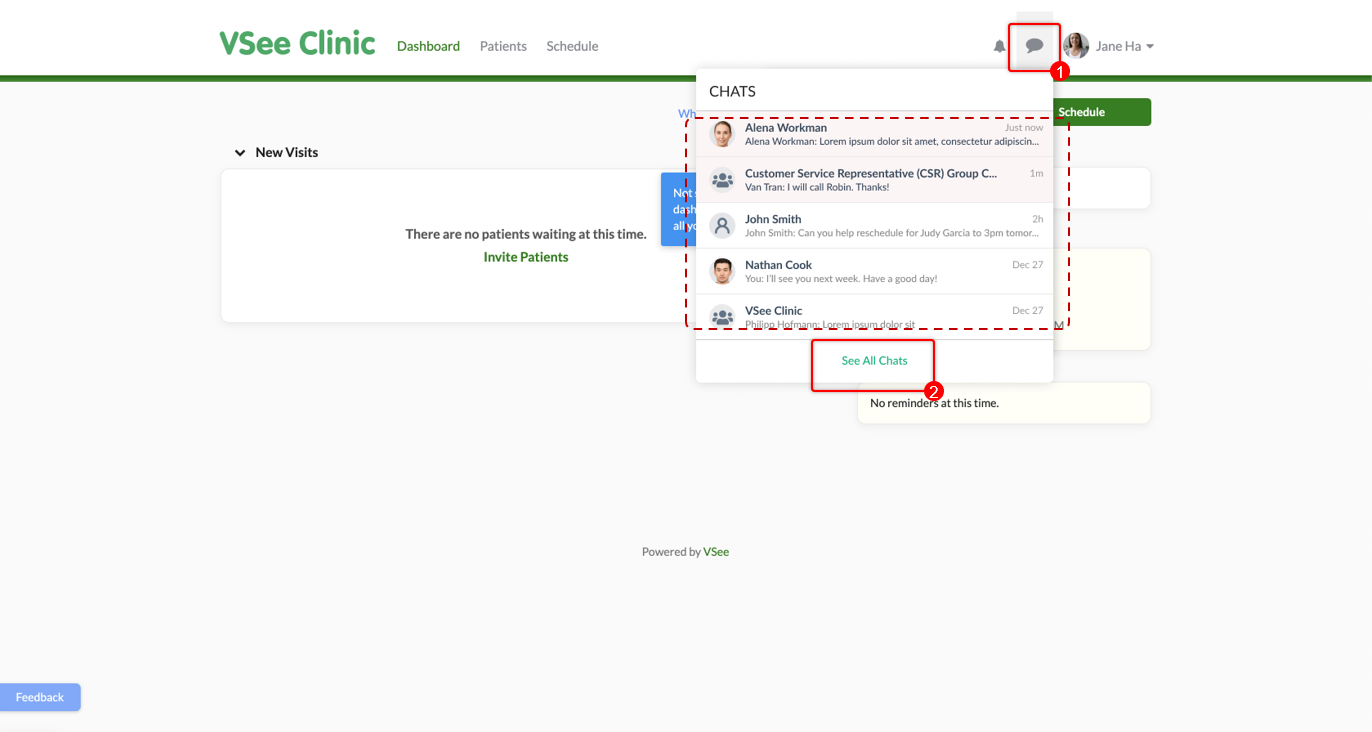
1. Click on the chat bubble button next to your name to view the chats dropdown.
2. Select from your recent chat conversations OR click See All Chats to view all of your messages.
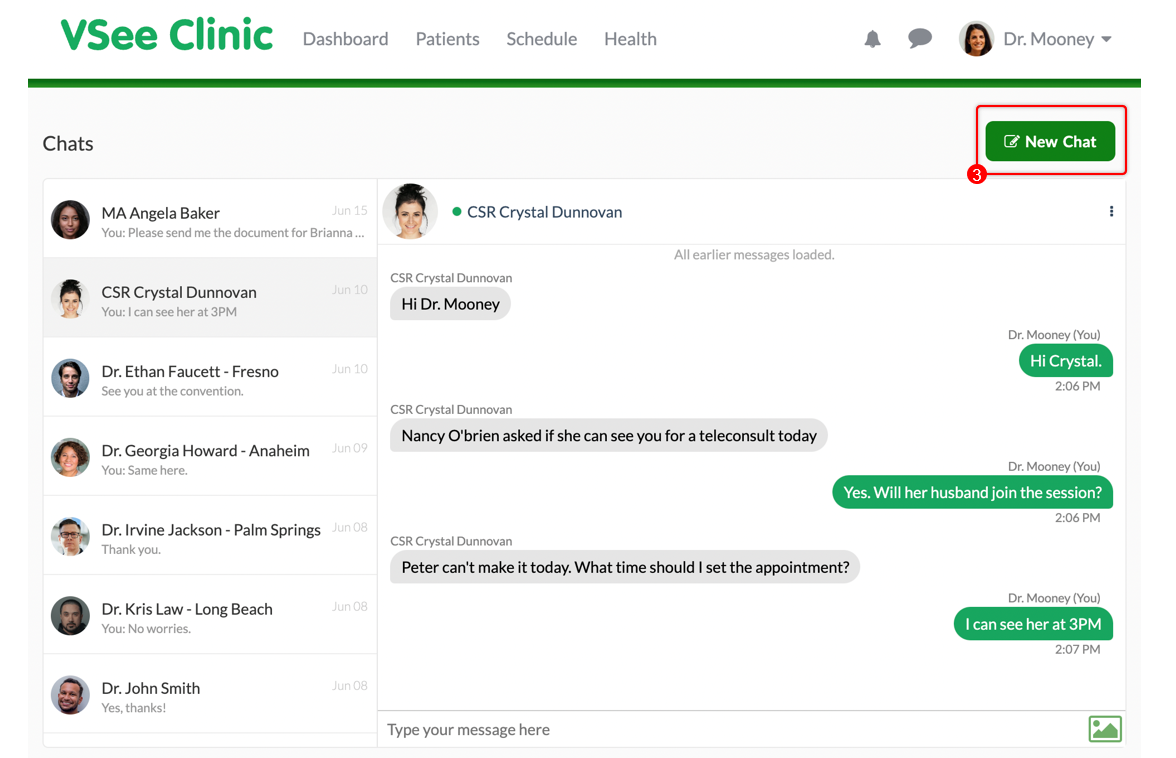
3. To create a new chat/conversation, click on New Chat.
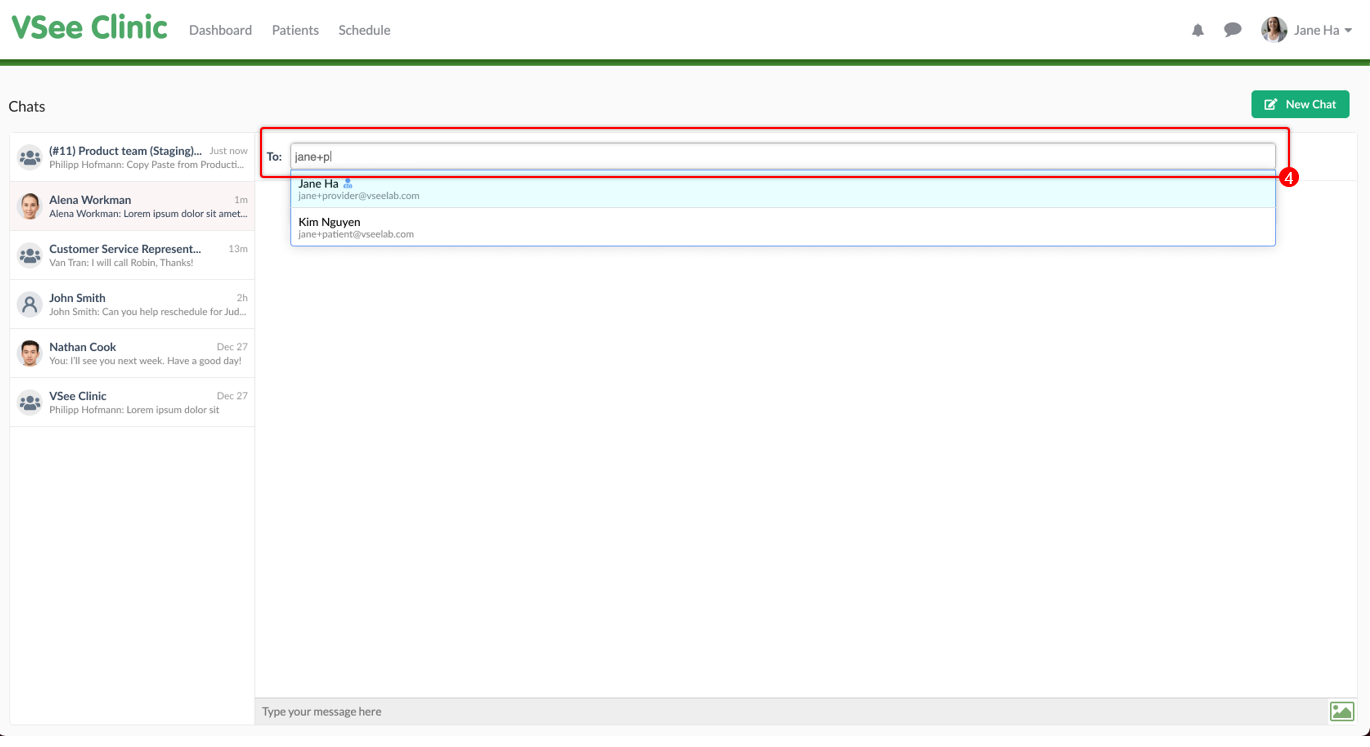
4. Type in the name or email address of the Provider/Staff you would like to chat with.
Note: This person should already be in your address book to show a result in the dropdown.
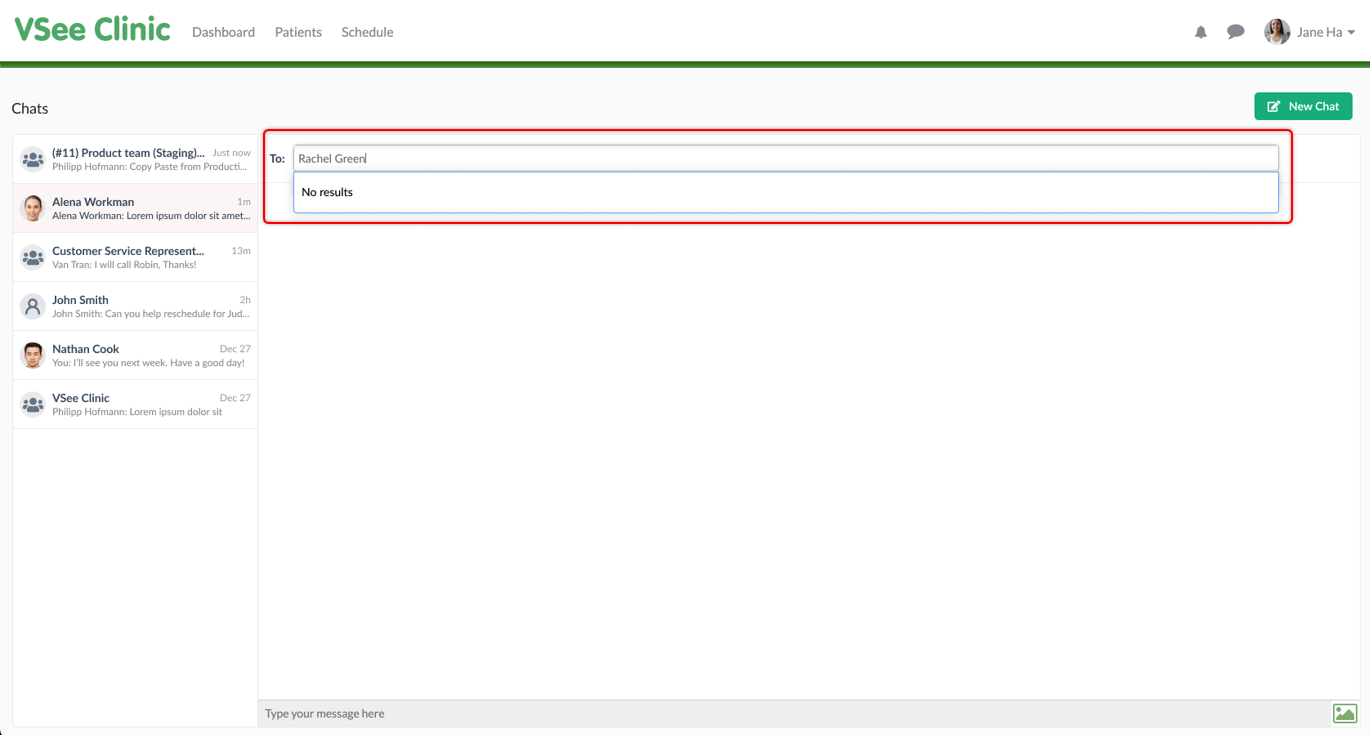
If it shows as “no result', this means the entered name or email can’t be found in your contact list.
5. Start a chat or continue the conversation with the person/group. Or you may send a file.
Add and Remove Participants from Group Chat
You can now add or remove participants from your existing group chats.
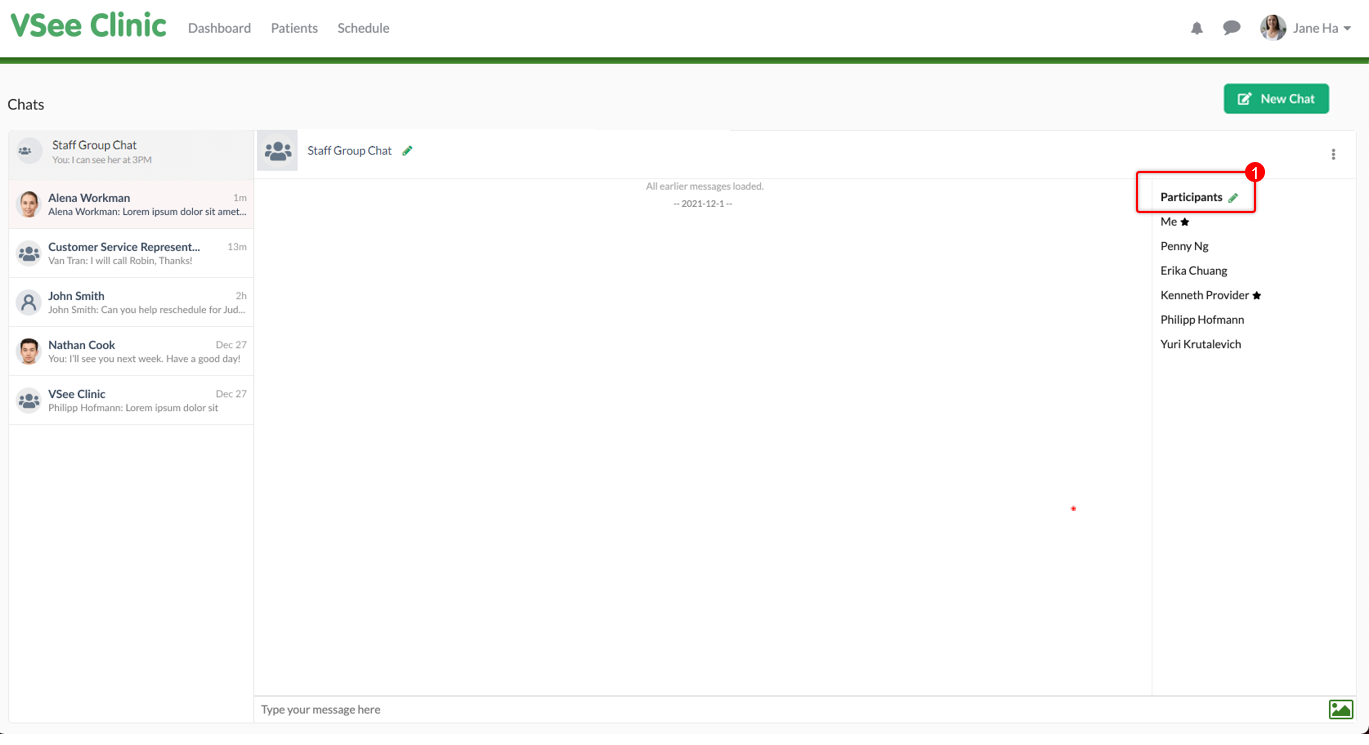
Add a Participant
1. Click the pen icon next to Participants.
2. Search the name or email address of the person you would like to add as a participant.
Note: This person should already be in your address book to show a result in the dropdown.
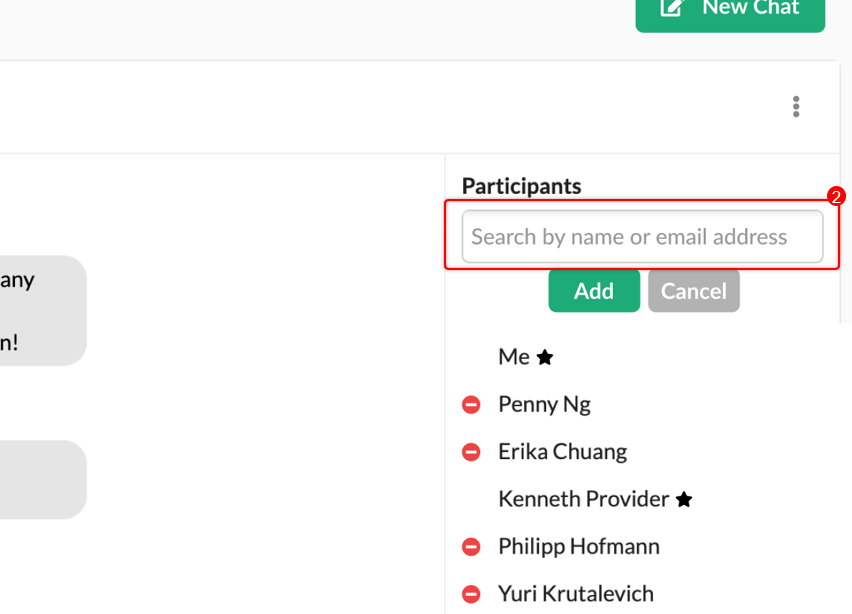
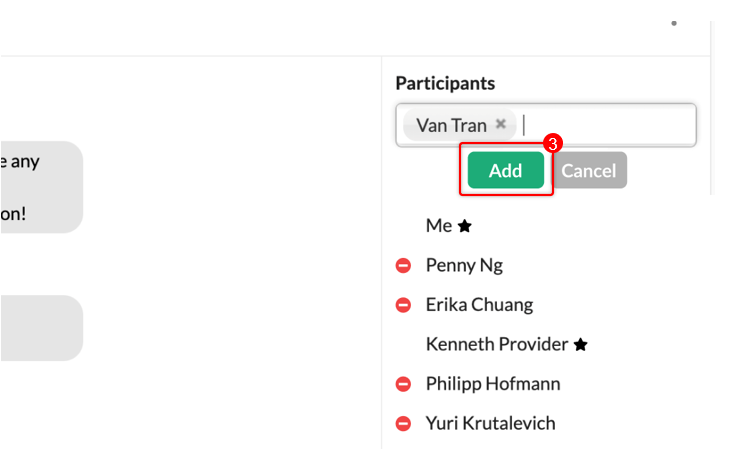
3. Click on the Add button.
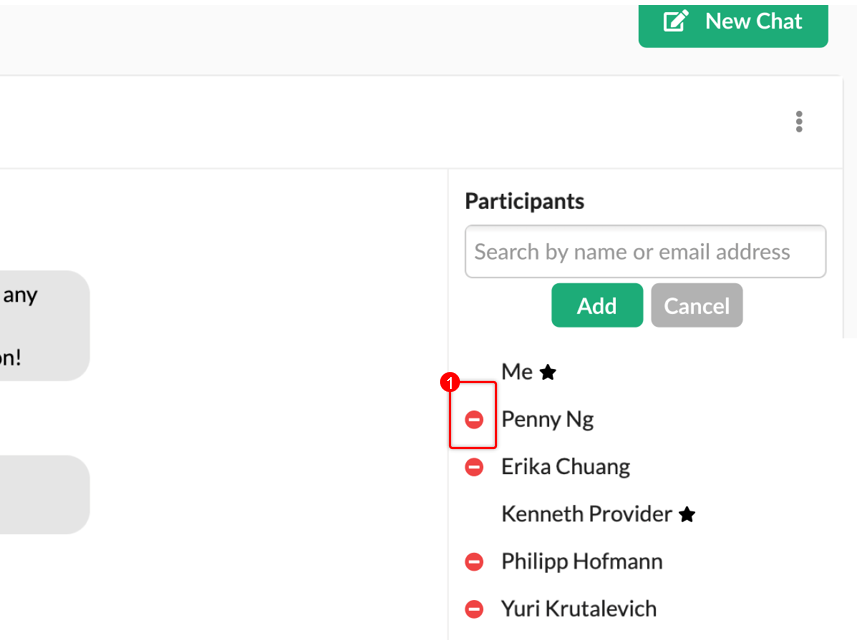
Remove a Participant
1. Click the minus/delete icon next to the participant’s name that you would like to remove from the group chat.
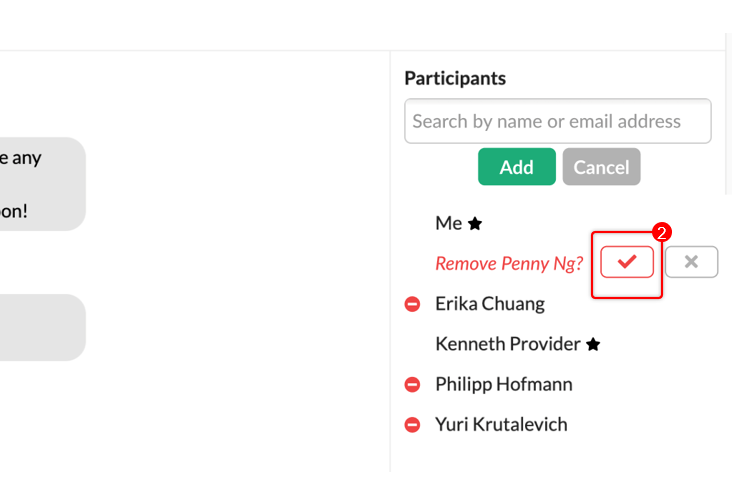
2. Click on the checkmark to confirm.
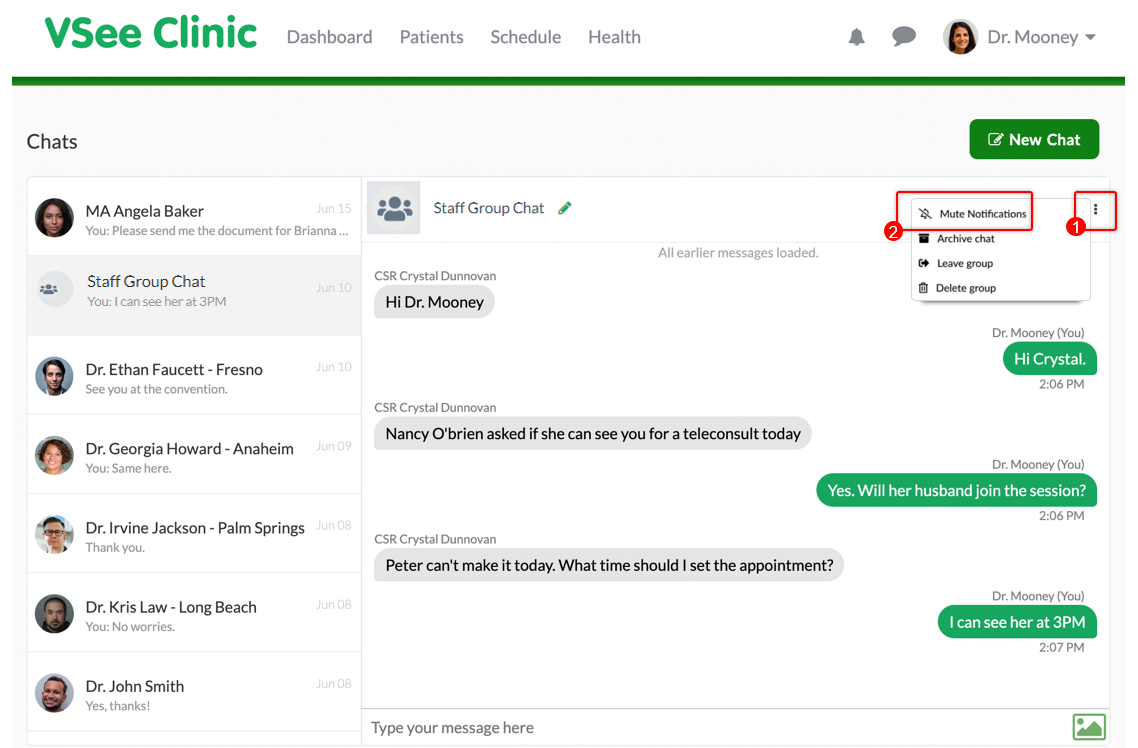
Manage Chat Options
Mute/Unmute Notifications
This mutes the chat sound & stops the webchat box from popping up (if not already opened).
1. Click the ellipsis or the 3 vertical dots to view the dropdown menu.
2. Select Mute Notifications.
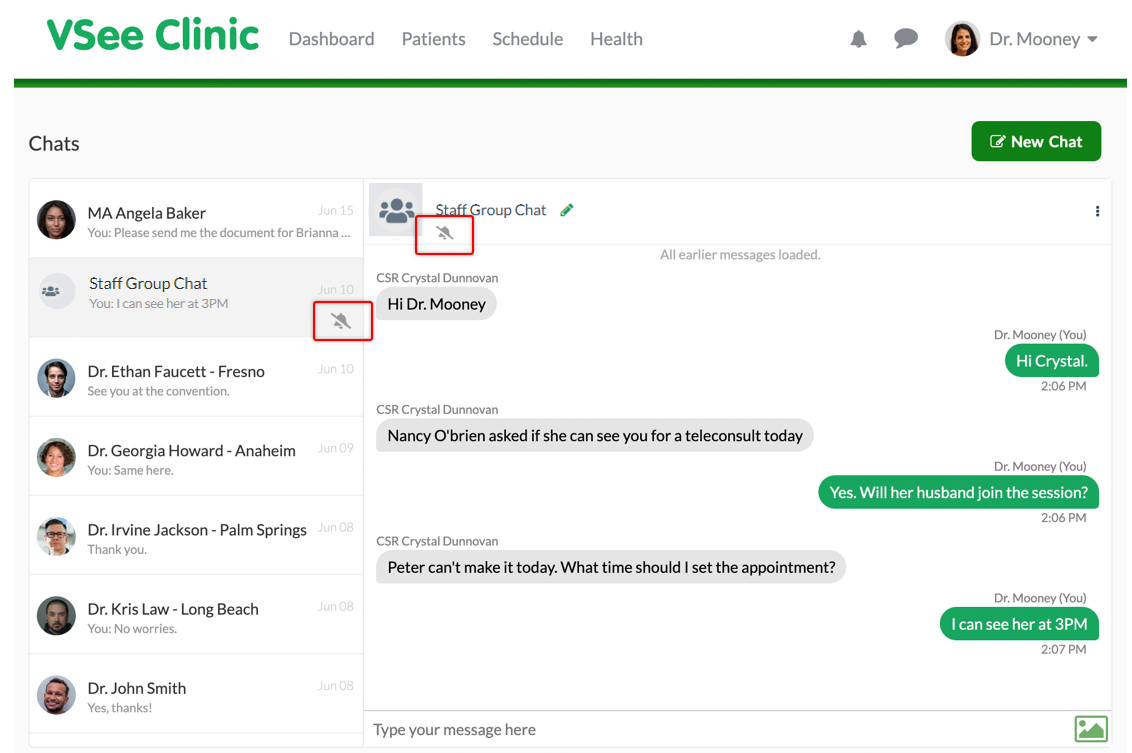
A muted bell icon will show at the bottom of the user/group name once muted.
Archive Chat
1. Click the ellipsis or the 3 vertical dots to view the dropdown menu.
2. Select Archive chat.
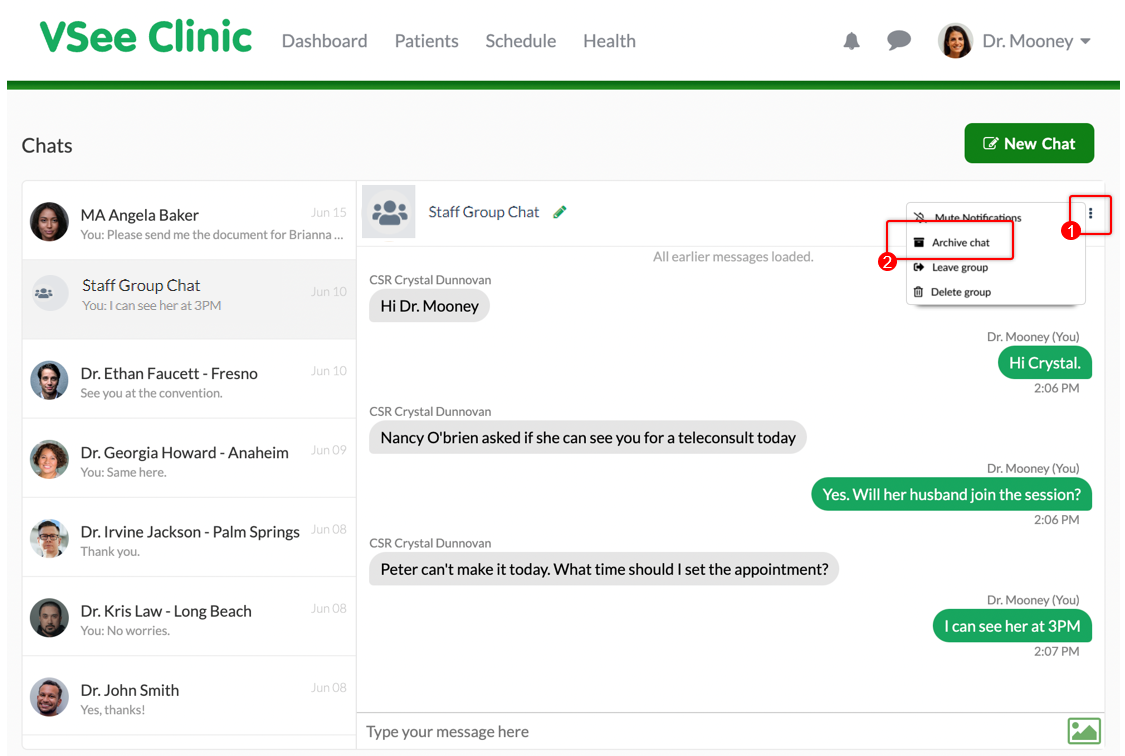
Note: You can bring the archived chat back to the list by clicking “New chat” and searching for that user/group name.
Leave Group Chat
1. Click the ellipsis or the 3 vertical dots to view the dropdown menu.
2. Select Leave group.
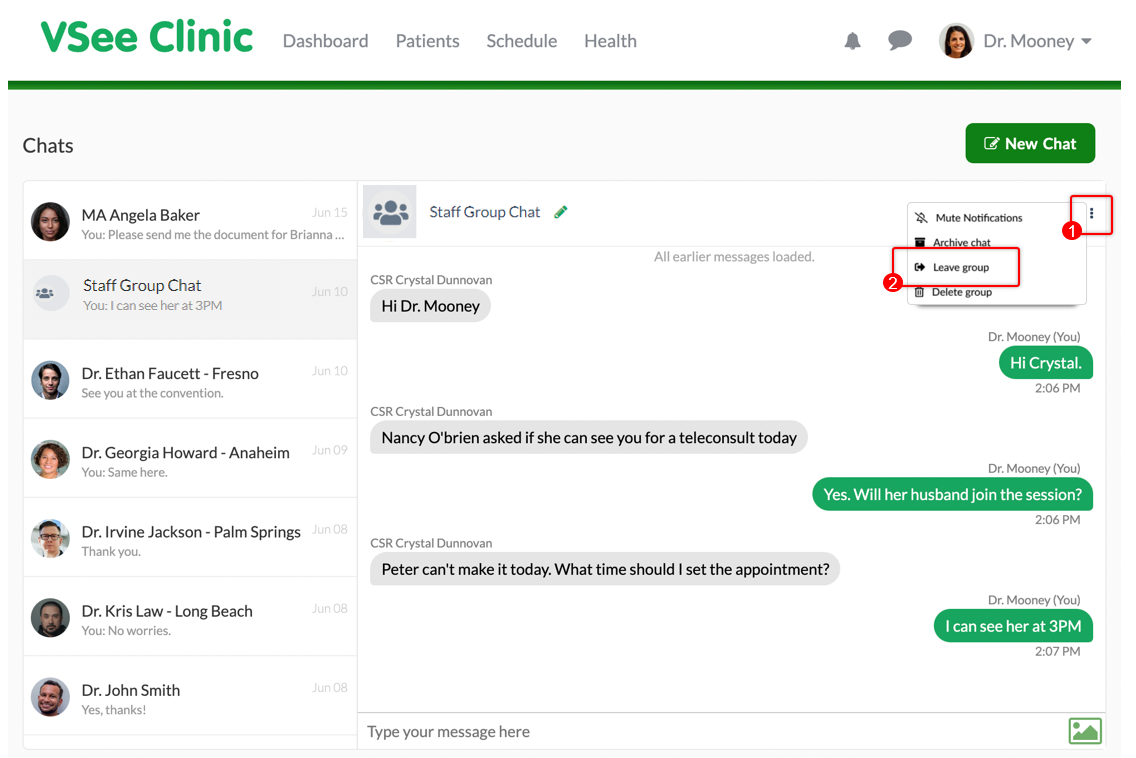
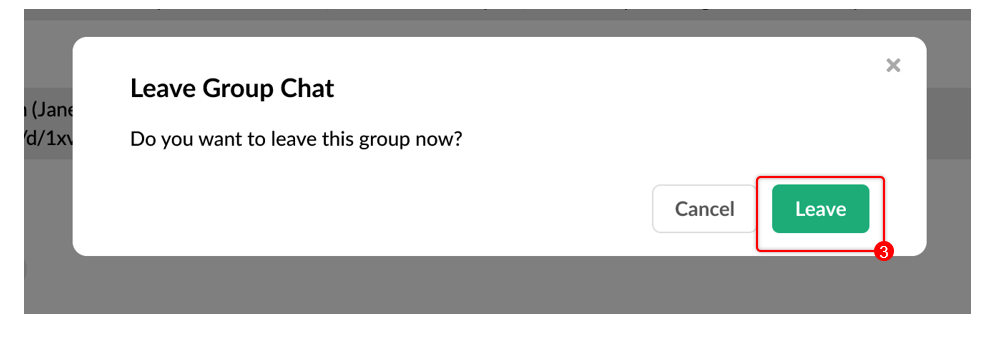
3. A pop-up notification will appear. Click on Leave to confirm.
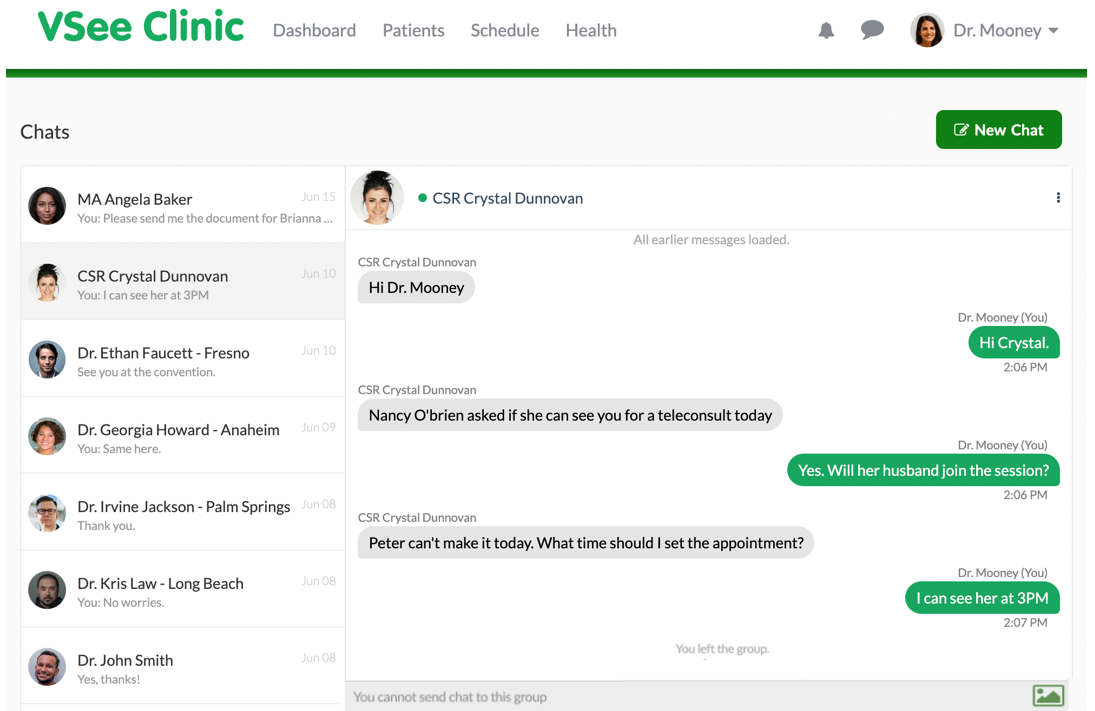
At the bottom of the group chat, it will show as “You left the group.” And the chat input field will show as “You cannot send chat to this group.”
Note: You will not receive any new messages or updates from this group until someone adds you back in.
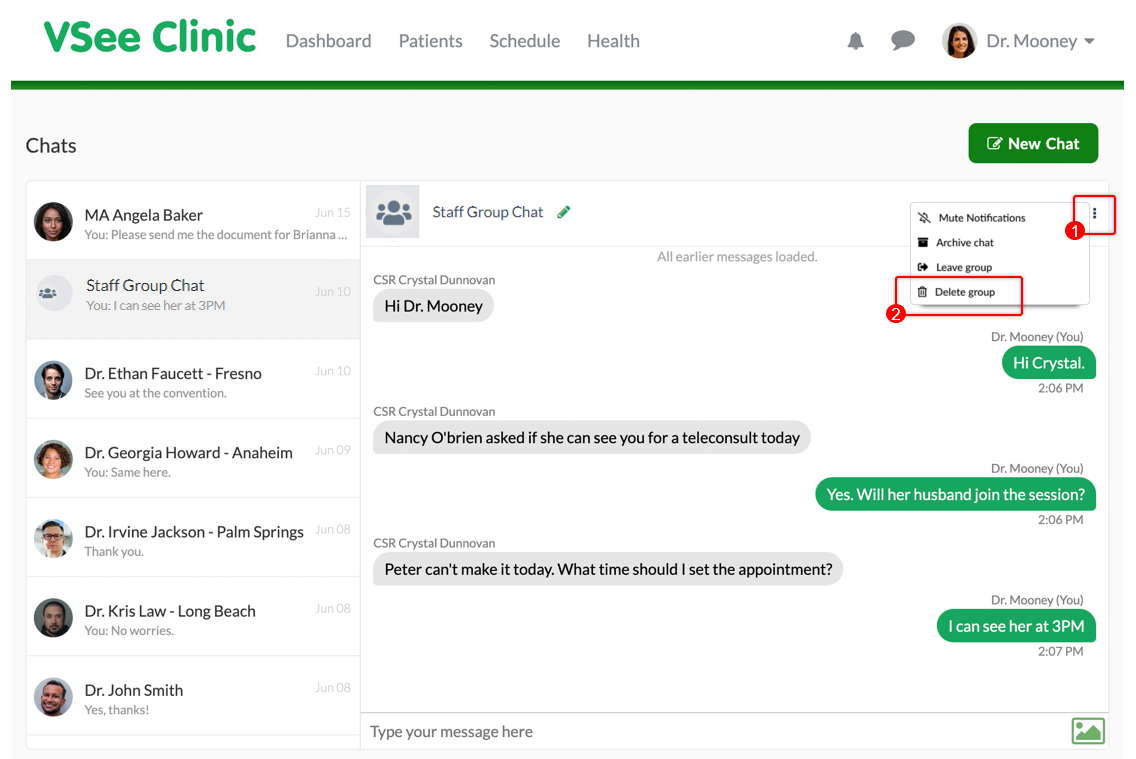
Delete Group
Note: Only the group owner can see this option. Once the group chat has been deleted, the chat will disappear from all members of the chat list.
1. Click the ellipsis or the 3 vertical dots to view the dropdown menu.
2. Select Delete group.
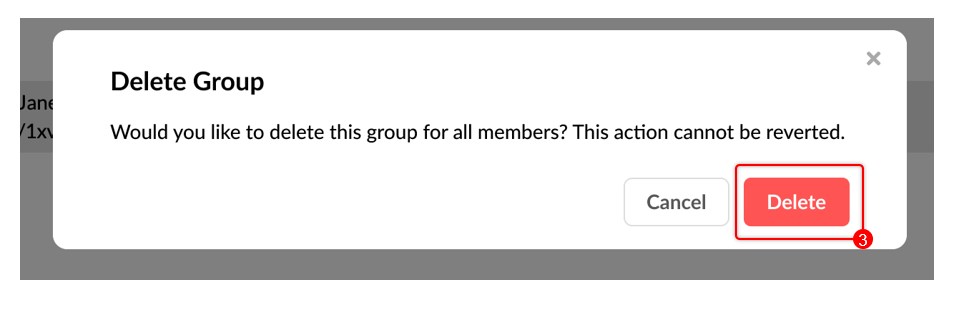
3. A pop-up notification will appear. Click on Delete to confirm.
Scope and Limitations
Only the group owner can delete a group chat.
Once the group chat has been deleted, the chat will disappear from all members of the chat list.
If you have any questions, please contact us at help@vsee.com.
This article was last updated on: 20 June 2022